
6 easy steps to clean your juicer.
Learn everything you need to know about how to clean and get rid of stains from your juicer.
Read More

Last Updated: May 12, 2022
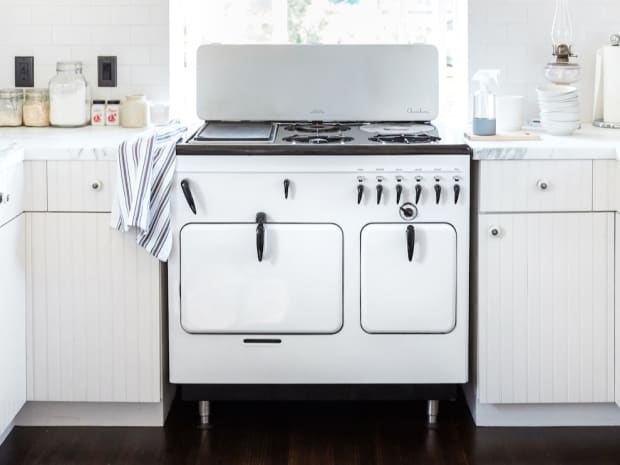
Could your stove top use a makeover? Set the harsh chemicals aside — we’ve got an easy step-by-step guide to make your stove burners look new using natural products.
In an ideal world, your stove top — along with every other part of your home — would be self-cleaning. Alas, we don’t live in a futuristic utopia, and sometimes the siren song of your latest Netflix binge is stronger than the need to clean your stove. We get it.
When the time comes to float back down to reality and deal with your sticky, gunky stove burners, we’re here to help. Read on and learn how to clean your stove burners with a few natural products you already have on hand.
Clean your stove burners daily. If you can’t (read: don’t feel like) cleaning your burners every day, try to clean them at least once a week to keep them from getting too gunked up.
If it’s been, well, a while since you last cleaned your stove top, start off by giving it a good deep cleaning and keep up with weekly maintenance from there. If daily or weekly cleaning is already part of your routine, you can opt to deep clean your burners once every three months. This is a good time to clean your oven, too!
Wait for the stove to cool off completely, then wet a microfiber cloth or sponge with warm water and a drop or two of dish soap.
Wipe down the stove top and grates. Lift off the grates off any burners you used and clean up any burned bits of food or spilled sauce. Let the stove dry before you use it again. That’s it!
If you’re cleaning after you’ve cooked, let the stove top cool off first. Fill the sink with hot water and enough dish soap to make the water nice ‘n’ sudsy. Don your gloves then take off the grates and burner caps, and plop ‘em in the soapy water for at least three hours — let ‘em soak overnight if they’re really icky.
Clean the softened residue off the grates and burner caps with a scrub brush. Depending on how gnarly they are, you might have to employ a bit of elbow grease. Once they’re clean, rinse them off and dry with a microfiber cloth or set on a towel to air dry.
Now for the stove top. Remove crumbs and debris from the stove with a dry cloth, then make a paste with 1/2 cup baking soda and 1/2 cup warm water. Use a cloth to cover the stove top with the paste, then spray cleaning vinegar over the paste and let it sit for half an hour.
Scrub! If the stove isn’t too dirty, you can use a microfiber cloth. If your stove could use a bit more TLC, grab an abrasive sponge and start scrubbin’. If stains remain around the burners, sprinkle a little more baking soda straight onto the stove and spray with a little vinegar until it fizzes, then scrub the stains away.
Soak a cloth in warm water and wipe away the baking soda and vinegar mixture. Once it’s all gone, dry off the stove top and replace the grates and burner caps. Et voila! Admire the fruits of your labor.
Grove Tip
Gas stove burners require more frequent cleaning than electric stoves because their ignition ports can become clogged and interfere with gas flow. If you’re deep cleaning a gas stove top, make sure to close the gas valve before you start cleaning to avoid a fire hazard.

Ready to tackle the dirtiest spots in your home? Grove Collaborative has you covered with Clean Team. Each week, we’ll do a deep dive into how to clean a different place or item in your home. No spot is too small — and we’ll tell you how to conquer them all, naturally.
Learn everything you need to know about how to clean and get rid of stains from your juicer.

Read on to learn how to clean nonstick pans quickly and naturally.

Our step-by-step cleaning guide will have you back to crisping pizza and baking fries in no time.

Our easy guide breaks down how to clean your dishwasher, naturally.