Image of a fork, knife, and spoon on top of a napkin next to a cup of coffee.

6 silver shining secrets that can be done with natural cleaners!

Last Updated: February 12, 2020


Discover the best tips on how to clean silver and ensure your items keep their shine and luster over time!

Alright, friends. Let’s talk about silver—silver of all shapes, sizes, and persuasions. You can use these natural cleaning tips to shine both the silver grandma left you in that dusty china cabinet, as well as the silver costume jewelry you’ve had since you were 12. Hey, no judgment! We like costume jewelry too.


These quick tips will help you take your silver from dull and dreary to shiny and cheery in no time.


For more help cleaning items around your house, see our all-purpose natural cleaning guides. Because no one wants harsh chemicals in their home, right?

Why should you clean silver?

Blue spray bottle illustration

Cleaning silver is important because silver items will lose their shine and luster over time. This is due to a chemical reaction between the silver and the sulphur that’s present in the air.


It can also be caused by hair sprays, perfumes, cosmetics, oils from the skin, hand creams, and even some types of foods—so basically everything in your home … great.


Nowadays, many silver items are plated with a thin coat of rhodium. It protects the metal from tarnishing and makes it brighter and shinier. However, this thin protection wears off quickly—and the result is blackened silver. That means if you want to remove the tarnish, your silver items must be cleaned occasionally.

How often should you clean silver?

Blue calendar illustration

Polishing silver once a year should be enough to keep it in good condition.


But, if once a year doesn’t satisfy your cleaning compulsion, an easy way to maintain the shine of your silver is to wash it with good old water. You can safely do this as often as 2–6 times in a year.


Ultimately, how frequently you clean silver depends on how often it is used, where it is stored, and where you live. Any humidity in the atmosphere can cause silver to tarnish more quickly.


Funny enough, silver items that are used more tend to tarnish less than those that are rarely ever used—go figure. However, if your silver is stored in fabrics or specially treated material designed for silver storage, it will maintain its luster and shine much longer, even if you don’t use it very often.

Mrs. Meyers cleaning products and Grove Co. cleaning caddy

Become a Grove member

Wondering who Grove is, what types of products we offer, and how to get a free gift set when you sign up? Learn more about flexible monthly shipments, customizing your shipment, and joining millions of happy households — no monthly fees or commitments required.

6 steps to naturally clean silver items

Step 1: Mix soap and water and rub with a damp cloth

Mix water with some fragrance-free dish soap and dampen a soft cloth in the mixture.


Rub your silver items with the cloth in a circular motion. This step will help dislodge and soften any dust particles and grime stuck to the items.

Step 2: Clean with a soft-bristle brush

Use your soft-bristled brush to clean the carved areas on your silver items. It will allow you to get into tight areas easily for a more thorough cleaning.


Though the bristles are soft, you should still scrub gently to avoid damaging your silver.

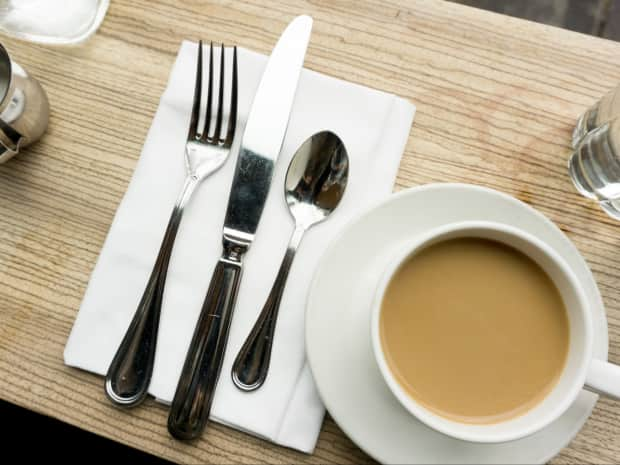
Step 3: Shine with a silver polishing mixture

This is similar to step 1, however, you can use a paste made of baking soda and vinegar to remove tarnish and leave behind shiny, sparkling silver.


For a baking soda paste: You can put your silver items in a baking soda bath (baking soda and vinegar—you can use cleaning vinegar or distilled white vinegar) in a bowl lined with aluminum foil for increased efficiency. Voila! Shining, sparkling silver.


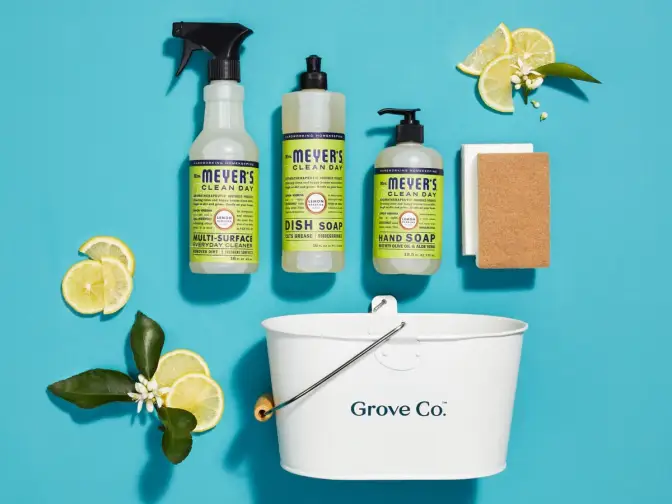
Quick tip: For those who aren’t the DIY type, we love Mrs. Meyer’s Baking Soda Cream Cleanser. It is mixed up and ready to do all the work for you.


After the items have been allowed to soak for awhile (a few hours is good), use a microfiber cloth to gently rub the silver in a circular motion.


Dip the cloth in your mixture if necessary for stubborn spots, or try allowing it to soak a little longer.

Step 4: Rinse with water

Once all visible tarnish is removed, rinse your silver items with clean, cold water to make sure no dish soap or cleaning solution is left behind.

Step 5: Dry with cloth

Use a microfiber cloth to dry your items properly.


You could also air dry, but you’ll want to make sure to set your items in a place to air dry that’s warm, bright, and not muggy. Otherwise, leaving behind water on the items may cause more dark spots and dullness.

Step 6: Store your silver properly

Store your silver items in properly-lined containers.


You can also use air-tight bags with anti-tarnish agents to store silver. That way you can slow down the chemical reaction with sulphur that’s present in the air, and delay the tarnishing process that occurs.

By minimizing tarnishing from happening, you will have to clean your silver less frequently, which is just good all across the board. Remember, every time you have to polish silver to remove tarnish, you also remove a thin layer of silver.


Remember: if you don’t store your silver properly, it won’t hold up as well and you’ll be cleaning it more frequently.

A couple more silver cleaning FAQs

What’s the best home remedy to clean silver?

White vinegar, hot, distilled water, and baking soda is the most popular home remedy to soak your silver and remove unsightly tarnish.


How do you clean heavily tarnished silver?

Very carefully! Heavy tarnish can inspire you to go overboard with the scrubbing. Use the steps and tips we’ve laid out above, and tread lightly.


Can you clean silver with vinegar?

Yes! See our tips above on how to do it effectively.


Want to learn more about cleaning vinegar while you’re here? We asked the experts how it works.


Cleaning your silver doesn’t have to be complicated. It’s frankly more time-consuming than anything else, since you have to allow time for soaking to remove tarnish.

Follow Emma Roberts' lead — Go plastic-free with natural products from Grove

Read more from Grove.