How to Wash Colored Clothes and Keep Them From Fading
Running colors in your laundry got you down? Stop the bleeding, slow the fading, and keep your colors bright — here’s how to wash colored clothes the right way.
Read More


Last Updated: July 21, 2022
Our step-by-step breakdown of how to tie-dye your clothes with natural dye from vegetables, spices, and other common ingredients you’ll likely find around your house.
Here at Grove Collaborative, we’re all for finding new uses for things you’d normally toss away — better for the planet and your wallet. So when we saw people dyeing clothes, linens, and other materials with plant-based dyes, naturally, we were curious. We turned to our compost bins, at-home gardens, spice racks, and CSA boxes to put natural tie-dye to the test, with some colorful results (and some epic failures). Here’s how you can tie-dye at home, from how to make vegetable dyes to the best way to get the perfect swirl pattern to how to avoid washing your results down the drain.
Natural dyes rely on plant-based and naturally occurring materials for their color, rather than chemicals. While synthetic dyes are cheaper and easier for coloring clothing, the potential risks often outweigh the advantages. Downstream effects of synthetic dyes include negatively impacting the health of the workers used in clothing production, water supply pollution, and potentially toxic and harmful chemicals making their way into items we wear closest to our bodies.
Traditional tie-dye methods are no exception, even if you’re DIY-ing at home. Home tie-dye kits often contain synthetic dyes, soda ash, and urea, which can end up in our waterways. And bleach-dyeing comes with its own hazards, especially if using chlorine-based bleach — from inhaling potentially harmful chemicals to negatively impacting aquatic life.
Most plant-based dyes require that you place roughly chopped fresh, ripe vegetables or fruits in a saucepan with enough water to cover. Bring to a boil, then reduce to a simmer for several hours until the water reaches your desired hue. Let the mix cool (or leave overnight, if you can swing it), then strain out the plant matter and you’re good to go.
If you’re using peelings and produce bits, know that the weight of the scraps should be equal to the weight of the entire object you’re dyeing. We weren’t armed with a kitchen scale, so we did our best to eyeball. For example, since onion skins are incredibly light, you’ll need a ton of them to produce a shirt weight’s amount of lasting dye, while beet scraps typically offer more bang for your tie-dyeing buck. Organic produce is best, as chemicals can interfere with the dyeing process.
Slice avocados, remove pits, and add pits to the dye pot. Remove meat of the avocado from skins, taking care to scrape as much away as possible so only the skin is left. Thoroughly rinse the skins to remove lingering avocado flesh and add the skins to the pot with enough water to cover. Bring to boil, then reduce and simmer for at least an hour.
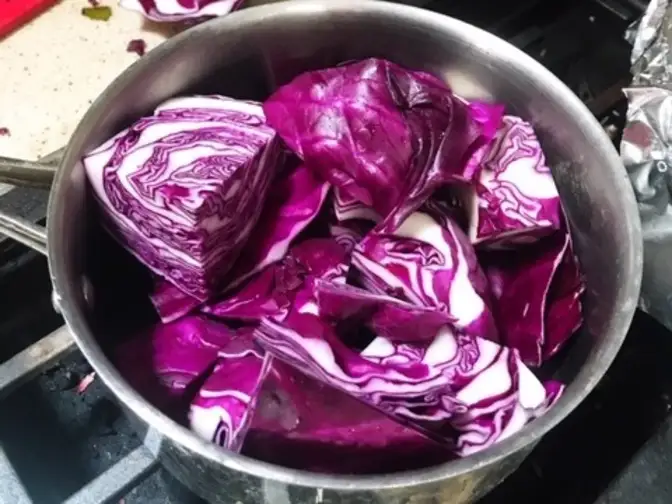
Remove any tough outer leaves, roughly chop, and add to a saucepan with enough water to cover. Bring to a boil, then simmer for at least an hour — and preferably several. Allow mixture to cool, then remove all vegetable matter with a strainer.
Combine the ratio of roughly three tablespoons spice to one cup water until you have enough liquid to cover your clothing item. Boil for an hour and let cool — you can add additional water at the end if needed, and no need to strain out the spice. The color will saturate materials quickly (usually within an hour), and this dye doesn’t require a mordant.
Remove beet tops, peel beets, and cut into quarters. Add to boiling water, boil for 5 minutes, then simmer for at least an hour and up to a day (the longer it simmers, the brighter the color). Remove beets from water with a strainer or spoon. You can pickle the leftover boiled beets or use them in beet brownies.
Grove Tip
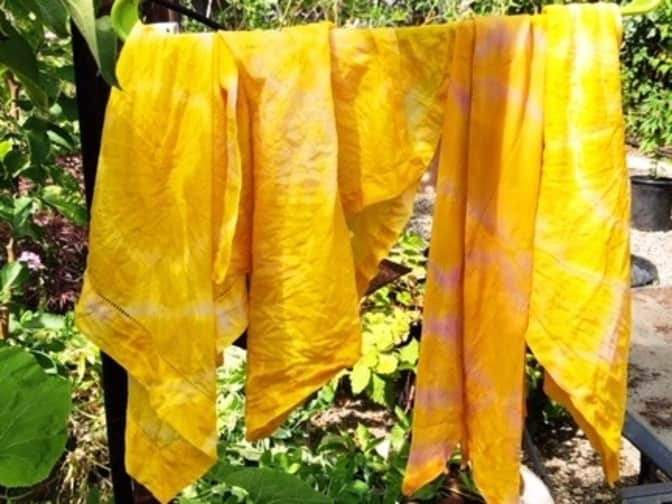
We had the best luck with curry powder, beets, and red cabbage during our own dyeing experiments, though only the curry powder produced a lasting tie-dye effect. Our spinach/mint mixture resulted in a rather lurid yellow (not helped by the addition of blueberries), and one of our avocado pit dyes maintained a nice blush pink until we threw in too many avocado skins (with green avocado meat attached), which transformed the dye into a murky bog. Your dye process will likely also be subject to some trial and error.
While a full dyeing set-up with buckets, different plant-based powders, and an array of dye-able materials is the ideal, we understand you might need to just make do with what you already have. Here’s our rundown of the tie-dye basics, using what you can find around the house.
Grove Tip
After a lot of trial and error, we suggest starting out with clothing made from natural materials, e.g., wool, cotton, silk, hemp, and linen. Silk and linen picked up the most color in our experiments, while cotton initially produced a bright result but was more prone to fading — and the dye washed out entirely upon first laundering. We didn’t attempt wool for this summertime experiment, but a light wool may also work well for retaining dye.
Before you do anything, cover your work station and put on gloves (if using) to protect your surfaces and your hands from errant dye.
1. Chop plant ingredients, cover with water, bring to a boil and then let simmer for at least 40 minutes, ideally several hours.
2. Let cool to room temperature.
3. Strain out plant material and move dye directly into dye buckets, glass jars, or back into the saucepan/pot.
1. Wash clothing: Damp clothing picks up dye better and makes it easier to twist the fabric into different shapes. Don’t dry.
2. If using a mordant, soak clothing for at least an hour, then rinse with cool water. NOTE: Spice-based dyes can be used on dry materials if needed.
3. Tie or rubber band items, depending on the desired result: See options below.
Choose a starting point for your twist; hold fabric between your middle finger and your thumb, letting the rest fall towards the ground (like a magician holding a scarf over his/her hand). Using your other hand, twist the fabric in a clockwise or counterclockwise direction until you're left with a long log-like bundle of twisted fabric. Rubber band or tie fabric tightly to hold the twist.
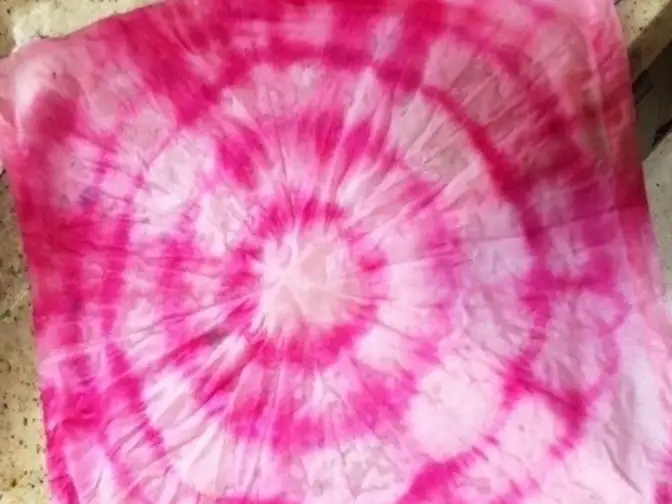
Pick a starting point as the center of your swirl(s). While holding one finger in the center, twist fabric around your finger so it gradually becomes a cinnamon roll shape. You can do this with two swirl “centers,” bringing the fabric together until it’s a tight package centered around the two swirls. Tuck any remaining fabric into swirls and rubber band or tie tightly so swirls retain their shape.
Starting with the longest side of your material, create a lengthwise fold, then flip the fabric over and create a similar fold on the other side, incorporating your first fold. Continue, and the end result should look like, you guessed it, an accordion. Rubber band or tie securely into place.
Randomly gather up bunches of fabric and secure into little knots (like hair buns) around your fabric. This will result in a more organic, random looking effect. Or scrunch your clothing into a tight ball and secure — the more random (and less neatly folded), the better!
Grove Tip
Unless you’re dyeing with onion skins or spices, you’ll need to soak your tie-dye/dyeing candidates in what’s known as a mordant (or fixative) prior to dyeing — this will help deepen the color and prevent fading. For fruit dyes, try combining ¼ cup salt and 4 cup water. For vegetable dyes, we used 1 cup vinegar to 4 cups water. For either mordant, submerge your clothing/future tie-dye items and simmer for an hour, then rinse with cold water.
1. Soak clothing in the dye bucket to completely saturate with dye. Other approaches include placing the item in an empty sauce pan and pouring the dye over it (using tongs to flip), or placing it on newspaper or other covering and ladling the dye over the item.
2. Let your item sit in the dye for at least an hour and up to a day — we found best results leaving the items overnight, submerged in the dye (exception was curry powder, which dyed quickly).
3. Remove item from dye and — with rubber bands/bindings still holding item together — rinse with cold water. We attempted to rinse with bindings removed, and all attempts resulted in a single-hued result (no tie-dye).
4. Once rinsed, remove bindings and hang to dry.
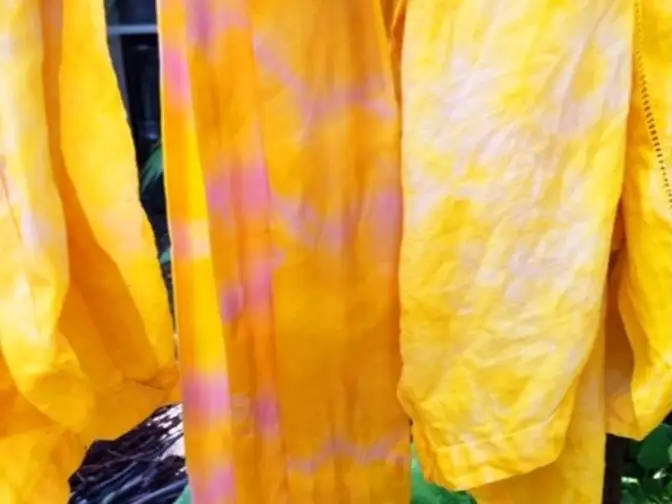
There’s no getting around it: Creating vibrant tie-dyes is more difficult with natural dyes. We attempted eight different tie-dye sessions, with two failed dyes (spinach/mint and a murky avocado bog), and most attempts at tie-dye either completely dyed the rubber-banded clothing or produced a tie-dye pattern so light it was hard to discern. We found the best results when starting with a completely beet- or red cabbage-dyed silk scarf, allowing it to dry, and then dyeing with curry powder for a pretty purple- and yellow-tinged result.
While this may not work with all natural dyes, we accidentally put a light purple, red cabbage tie-dyed cotton tee to the test against our Grove Collaborative laundry detergent, doing everything you aren’t supposed to do to retain the color: ran it on warm in the wash and medium in the dryer. The T-shirt emerged as if it had never been dyed. So if you aren’t happy with your results, at least rest assured that Grove’s laundry detergent is tough on veggie stains (but it may not be ideal if you’re looking to retain your tie-dye).
Running colors in your laundry got you down? Stop the bleeding, slow the fading, and keep your colors bright — here’s how to wash colored clothes the right way.
20 Mule Team Borax is a popular powder cleanser and laundry booster. But how does it really hold up to tough stains? Grove writer Kristen Bailey took on 5 tough stains and odors to test out 20 Mule Team Borax and its cleaning capabilities.

Avoid a trip to the dry cleaner and get your cashmere feeling fresh and luxurious from home. Here’s how to take care of your favorite cashmere pieces.

A simple enough task yet not exactly intuitive, we at Grove have made things easy for you by creating a step-by-step guide on the best way to give your hat a quick wash or a full deep clean.
From timely topics such as our natural sunscreen breakdown to evergreen primers like our rundown on how to go plastic free, our handy guides are here to answer your most pressing questions. And let us know if you have any natural tie-dyeing questions (or share your own tips for making your colors pop using #grovehome) by following Grove Collaborative on Instagram, Facebook, Twitter, and Pinterest.
If you're ready to go beyond tie-dye and make the switch to eco-friendly products, explore Grove Collaborative’s collection of natural cleaning products.